Crafting can be one of the most relaxing hobbies you can choose. With all of the amazing embellishments from IOD these days, it's easier than ever to transfer beautiful images, stamp detailed scenes and mould gorgeous and interesting castings. And, they can all be used on furniture as well as crafting projects. Let's get started with our latest DIY plaque for spring.
Here's What You Need
5x7 Wood Blank
Annie Sloan Chalk Paint® in Old White or Original & Rodmell
ModPodge
Annie Sloan Metallic Paint in Traditional Gold
Floral Paper Napkin or Decoupage Paper
IOD Stamp Set in Kindest Regards
IOD Ink in Black and Stamp Pad
IOD Moulds in Juliette, Frames & Fleur De Lis
IOD Air Dry Clay
NOTE: We used a lot of different products and colors on this one but you can simplify and experiment to get your LOOK.
Let's Get Started
Our first step was painting a base coat of Chalk Paint® on the wood blank. We used Original but Old White would also work.
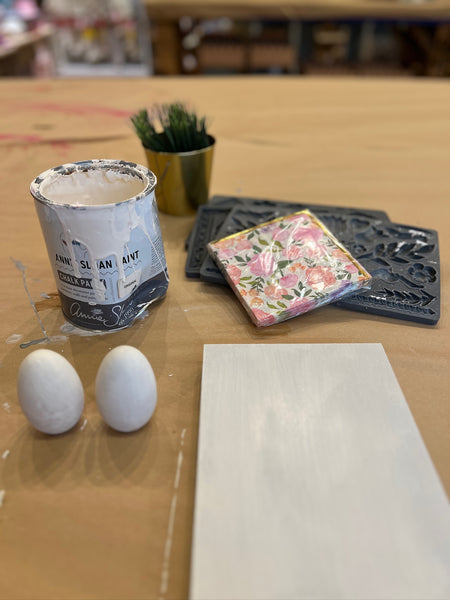
Then we decoupaged a paper napkin onto the surface. The decoupage process is simply using a glue medium to adhere thin paper to your surface. We used ModPodge mixed with a bit of water to thin it down and painted a thin coat onto the blank. We carefully laid the paper down and put another thin layer of glue onto the surface. That's the decoupage process, simple, glue both underneath and top of the paper surface. You will have a few small wrinkles but that just gives your piece a bit more texture and we LOVE that! The more you practice, the more you will learn little tips and tricks to get it smooth.
Since the napkin we used was 2 ply, we separated the layers and only used the top patterned layer. It takes a bit of patience to separate the layers but it's really worth the effort.
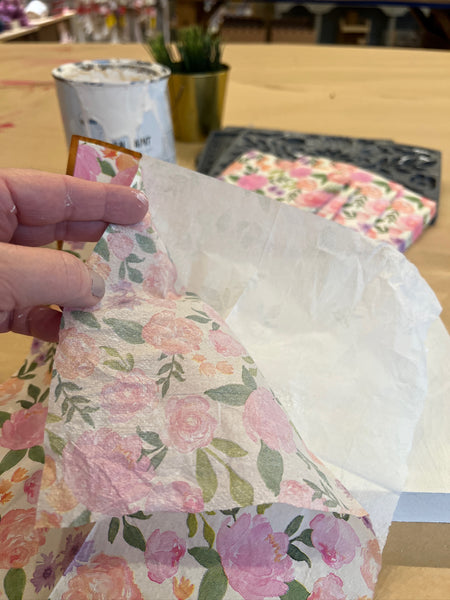
We overlapped the paper a bit - it's easy to sand off the edges when it's dry!
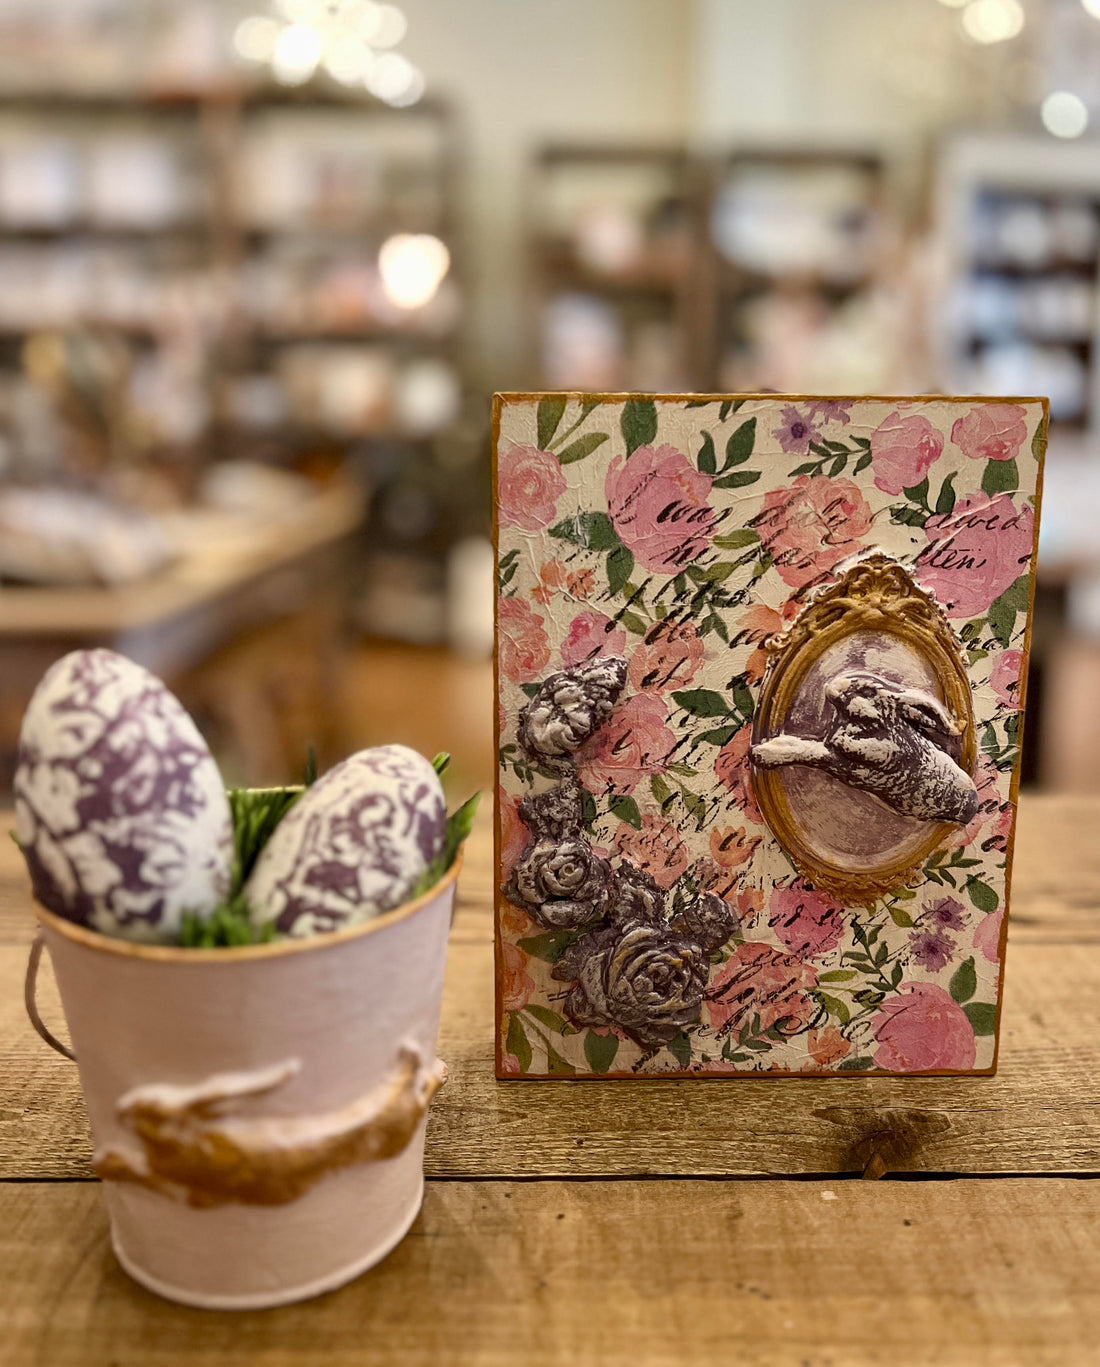
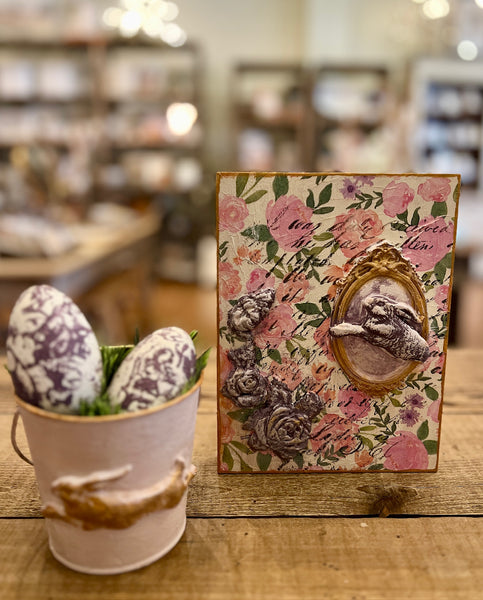
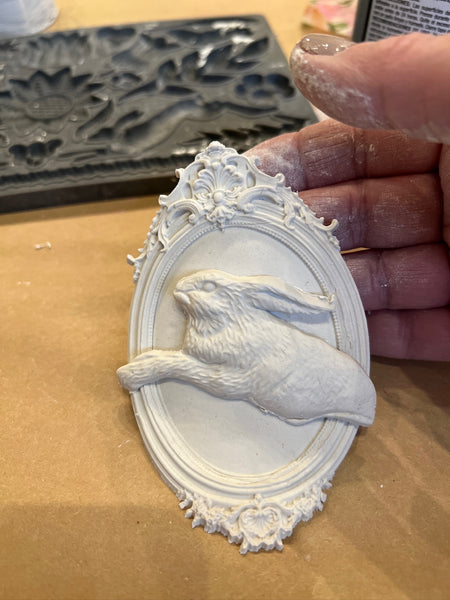
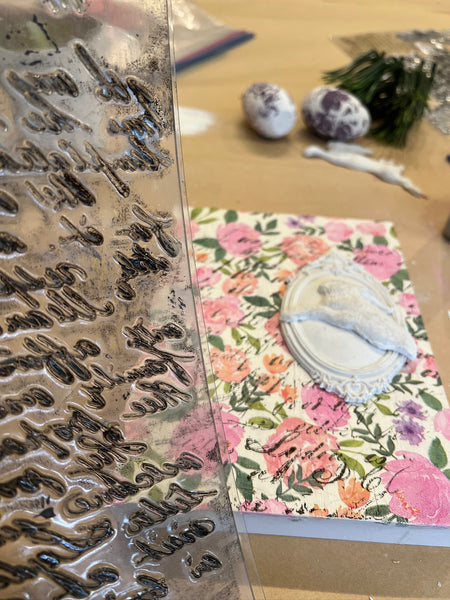
Once we let this dry to the touch we added castings by Iron Orchid Designs. We used the Fleur De Lis Mould for the bunny and the Frames Mould for the mini frame. You can see we layered the two moulds right on top of each other. Press air dry clay into the silicone moulds and out comes a detailed shape that is easily manipulated to set on any surface. Our favorite glue medium to attach castings is TiteBond. There is something very satisfying about working with clay!
BROWSE ALL SUPPLIES HERE
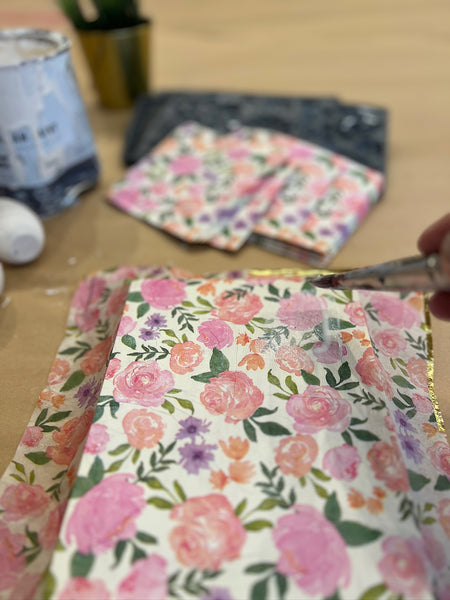
Then we used black ink on the Kindest Regards stamp set and added the lettering right onto the napkin. Fun Fact about the stamp set, it's written in French and it's an old love letter (so sweet & romantic).
We used Rodmell to paint the moulds and when it was dry to the touch, we did a wash of paint over the whole thing to pull the colors together. Washes are used almost daily around here because it's such a softening technique when using multiple colors. You simply mix a color (we used the Original) with water and make a watery wash of color to paint over the whole piece. While it's still wet and watery, you can dab or gently rub away the water and you are left with bits of color.
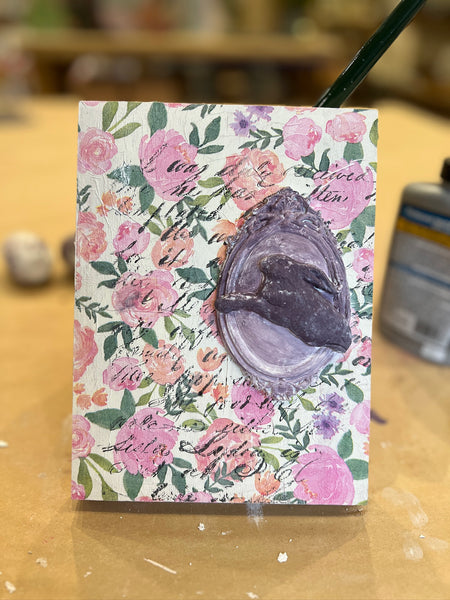
To finish, we added roses from the Juliette Mould and Traditional Gold Metallic Paint by Annie Sloan. The metallics give that finishing touch. We hope you enjoyed following along with this project and leave any comments or questions you may have ~ rachel + gail
BROWSE ALL SUPPLIES HERE