
This is one of the fun crafts that we've developed for a 2 hour workshop at our brick and mortar in Tracy, Ca. We love to teach different paint techniques with our workshops and this one focuses on "dry brushing" to get a beachy or textured look. We'll explain more below. In the meantime, here's what you'll need for this project.
- Unfinished sign blank (you can find them at most craft stores)
- Chalk Paint® by Annie Sloan in Coco, Honfleur, Old White, Frida Blue, Giverny, Barcelona Orange, Emperor's Silk and Arles. Ok, we used a lot of colors here, we even mixed a couple, but you can simplify and it will still look great!!!
- Paint Brush
- Iron Orchid Designs Letterpress Stamp Set
- Debi's DIY Big Top Varnish
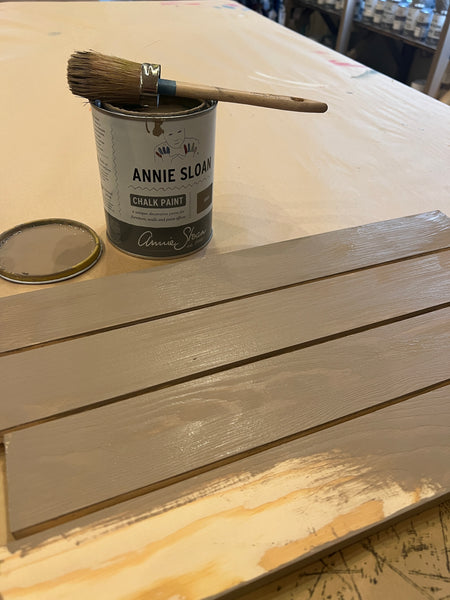
We painted one base coat of Coco on the whole sign.
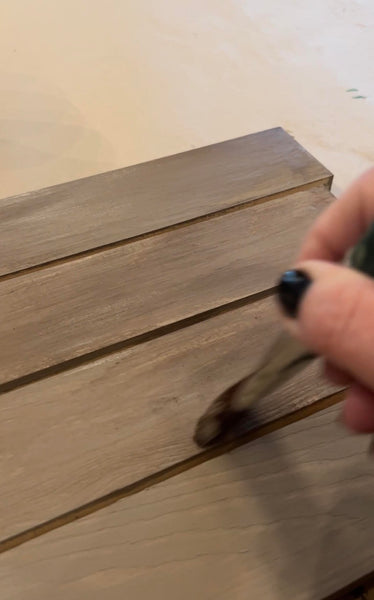
We "dry brushed" on a bit of Honfleur to start giving the piece texture so it gave it a vintage wood look. Dry brushing is a technique we use a lot! It's basically just dipping into the paint and then off loading most of the paint onto a rag or cloth. That leaves a small amount on the brush that you can lay onto the surface of your piece and blend in or leave as streaky as you like. It's more art than science, so just work with it until you like the results. The great thing about Chalk Paint® is that you can paint right over it without sanding if you decide you don't LOVE it.
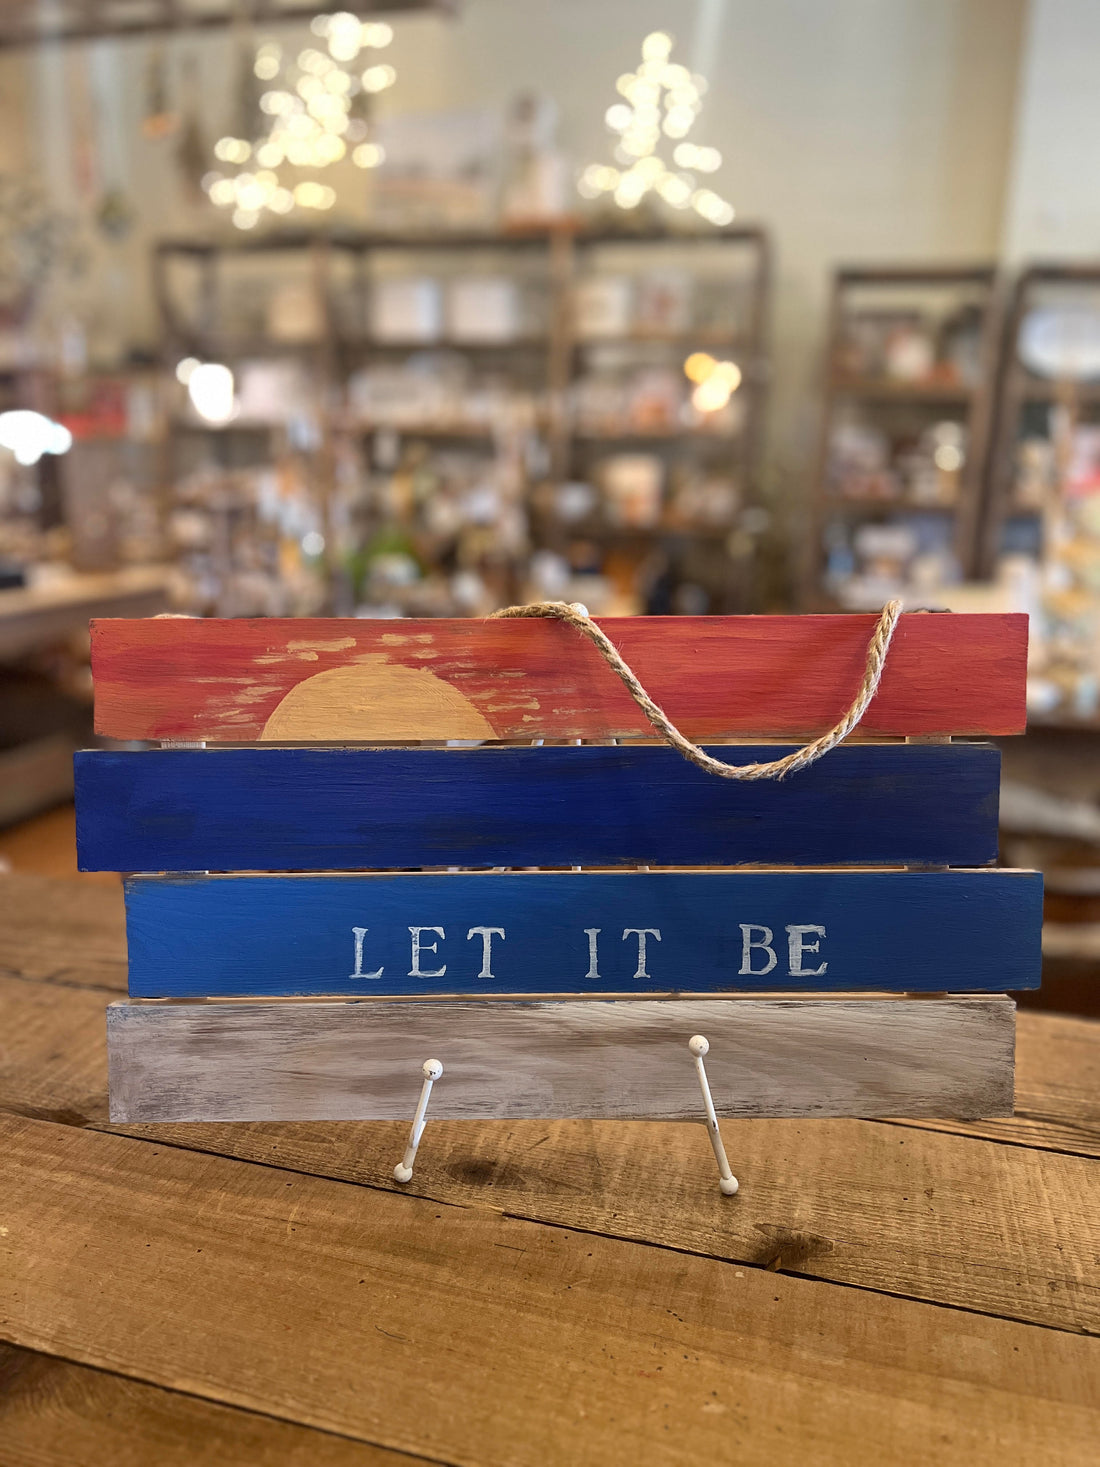
Here are the colors we used on the slats
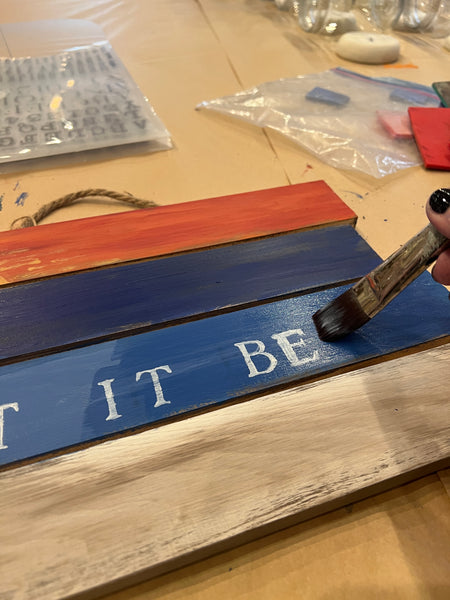
Bottom Slat - we dry brushed Old White and blended a bit - same technique we used with Honfluer over Coco. We are building texture this way and gives fun results.
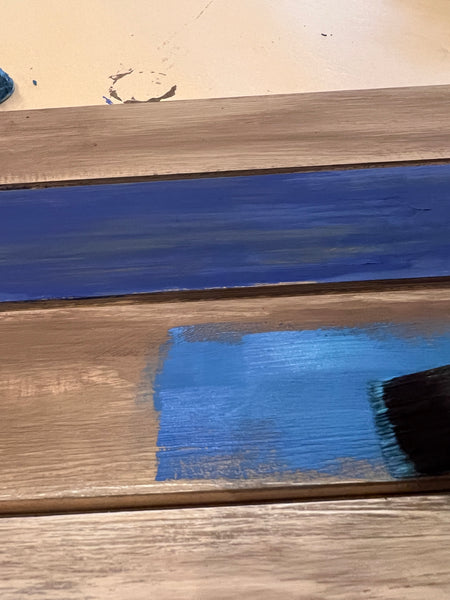
Second Slat from the Bottom - we mixed Frida Blue and Giverny together to make this great color.
Third Slat from the Bottom - We painted straight Frida Blue.
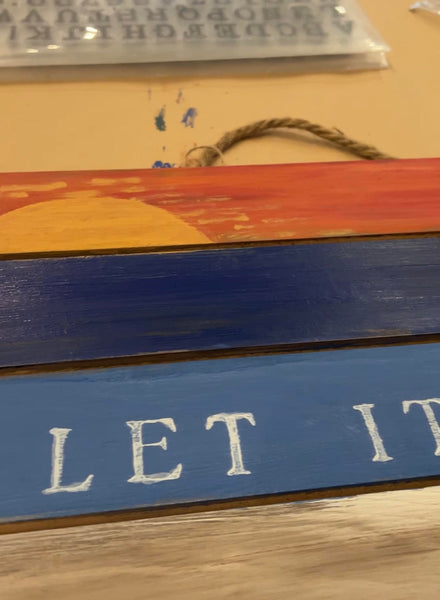
The Top Slat - We mixed Barcelona Orange and Emperor's Silk for the sunset and Arles for the sun. Then we dry brushed Arle around the sun for the rays.

Next, time to stamp the saying. We used the Letterpress Stamp Set from IOD and Old White Chalk Paint®. On most projects, we use IOD ink but for this one, we decided to load the stamps with Chalk Paint®. After the paint dried, we lightly sanded the whole piece with high grit (220) sand paper to dull it a little and make it even out.
Final step was adding a finish to seal and protect our work. We've recently started using Debi's DIY BIG TOP. It's a top coat varnish that goes on easily and dries quickly. It's our new go-to!
Hope you had fun reading this and got inspired to try a new project and new techniques. Happy painting ~ gail + rachel